Overview
The adi_driver pacakge contains driver nodes, configuration files
and launch files for Analog Devices Inc.(ADI)’s sensor products such
as accelerometers, gyroscopic sensors and IMUs (Inertial Mesurement
Units).
Currently these sensor devices are supported:
- ADIS16470
- Wide Dynamic Range Mini MEMS IMU
- ADXL345
- 3-Axis, ±2 g/±4 g/±8 g/±16 g Digital Accelerometer
- The support for this device is experimental
You need this interface hardware to connect the sensors and your computer:
- USB-ISS
- USB to SPI/I2C/Serial converter by Devantec
Prerequisite
This package has been tested on the following environment:
- ROS Kinetic Kame and Ubuntu Linux 16.04 “Xenial” 64bit
- ROS Indigo Igloo and Ubuntu Linux 14.04 “Trusty” 64bit
Install ROS
You need to install ROS system into your computer. If you have already installed ROS, skip this section.
The following snippet shows a simple way to install ROS Kinetic on Ubuntu linux 16.04 Xenial. For completeness, you’re advised to see ROS wiki.
sudo sh -c 'echo "deb http://packages.ros.org/ros/ubuntu $(lsb_release -sc) main" > \
             /etc/apt/sources.list.d/ros-latest.list'
sudo apt-key adv --keyserver hkp://ha.pool.sks-keyservers.net:80 \
             --recv-key 421C365BD9FF1F717815A3895523BAEEB01FA116
sudo apt-get update && sudo apt-get install -y python-rosdep
sudo rosdep init && rosdep update

echo "### For ROS setting" >> ~/.bashrc
echo "source /opt/ros/kinetic/setup.bash" >> ~/.bashrc
source ~/.bashrc
If you need older version ROS Indigo, also please consult ROS wiki.
Install adi_driver from Internet(Recommended)
The adi_driver is released to ROS Indigo and Kinetic. You can
install the package by ordinally apt-get command as:
sudo apt-get install ros-<kinetic or indigo>-adi-driver
Install adi_driver from Debian package files
Note that you should install from Internet if you want automatic upgrading of the pacakge.
When you are going to install the package from a deb file, place it under current directory and run:
sudo apt-get install -y gdebi
sudo gdebi -n ros-kinetic-adi-driver_1.0.0-0xenial_amd64.deb
gdebi command helps to install all packages which the target
package depends on.
USB-SPI Adapter: USB-ISS
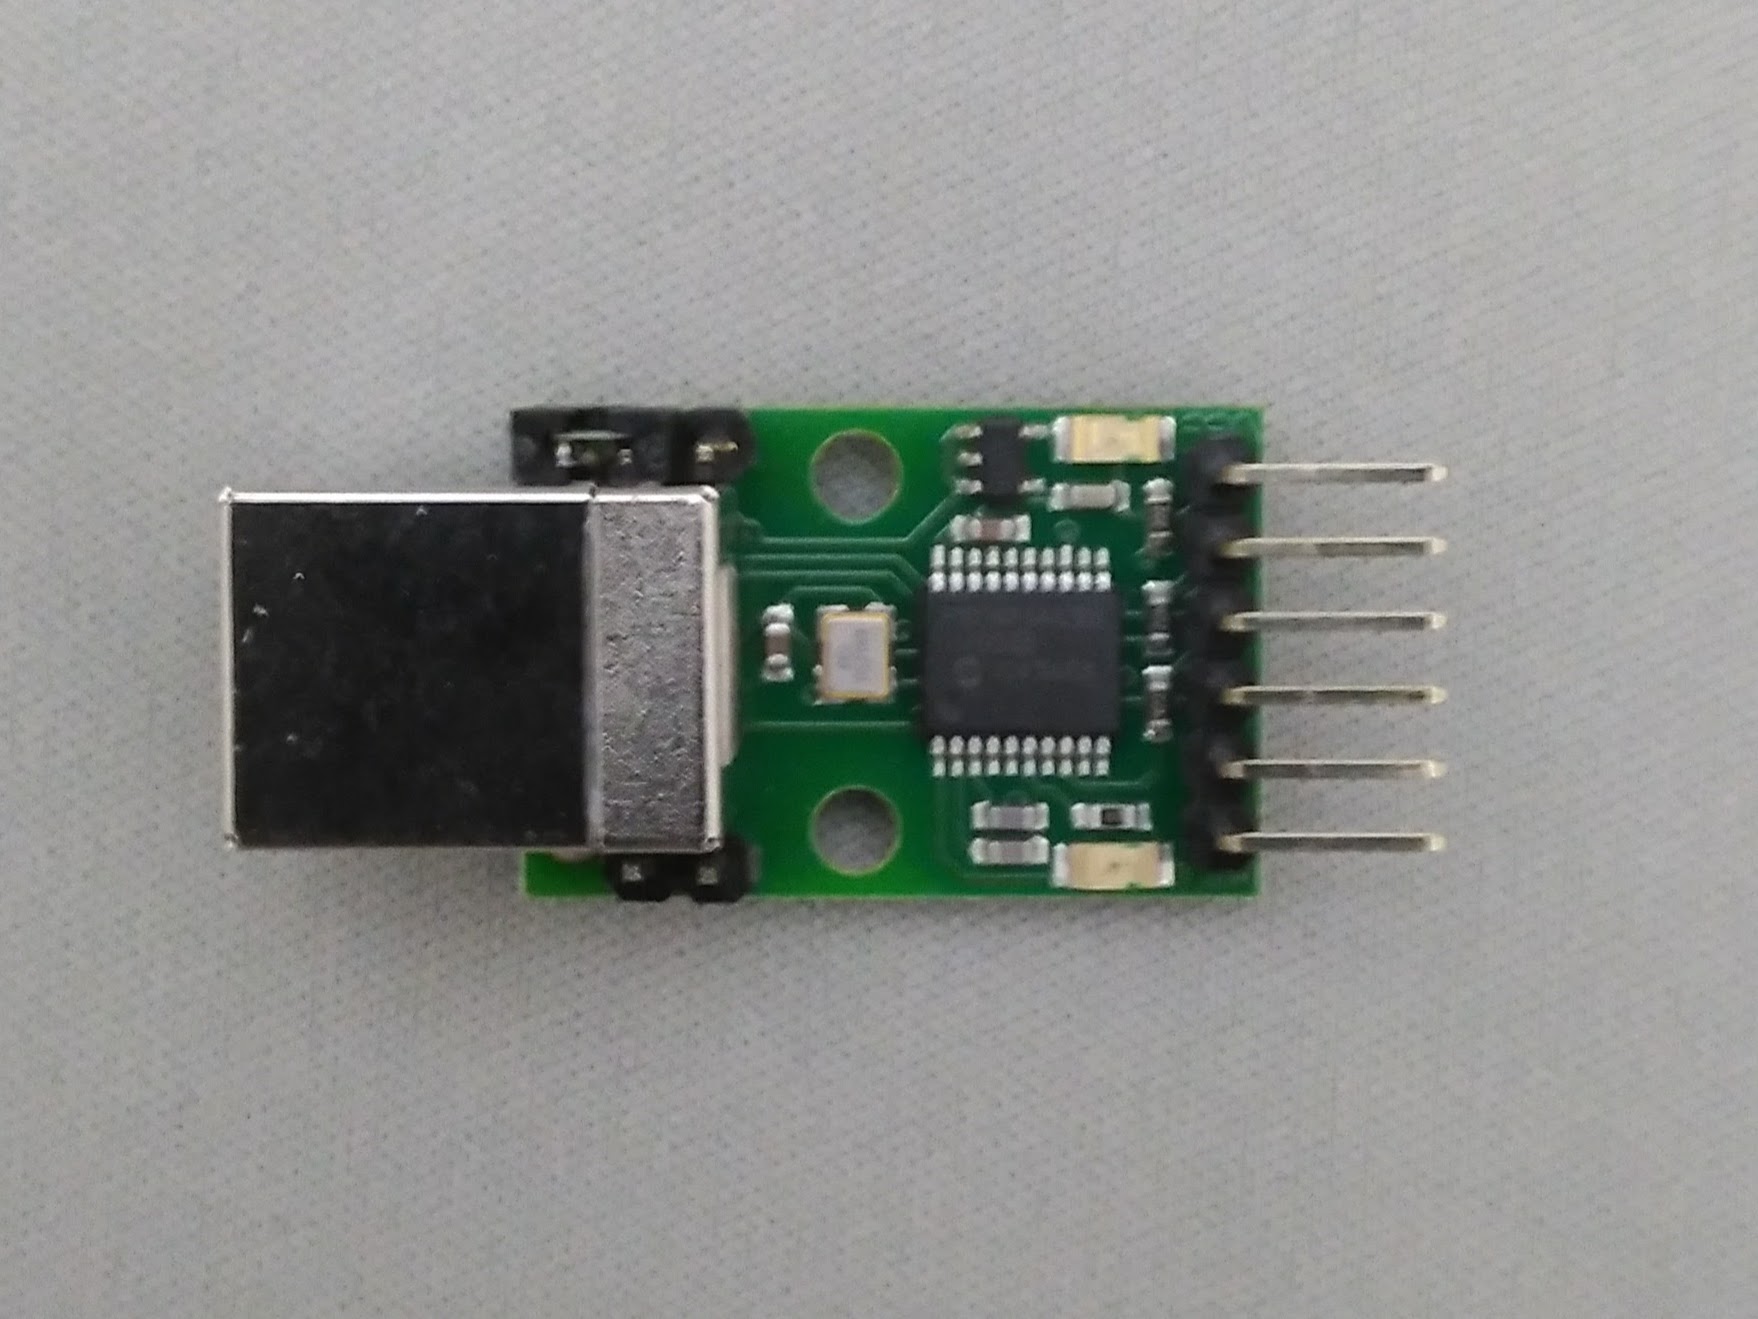
USB-ISS is a USB to Serial/I2C/SPI converter by Devantec, simple, small and easy to use. You don’t need any extra library such as libusb and libftdi. Once plugged, the device is available on /dev/ttyACM* as a modem device.
USB-ISS provides 3.3V or 5V power to the sensor device from USB bus, so you don’t need external power source if the sensor consume low current.
You need to remove the jumper block on Power link pins to provide
3.3V for the device. ADIS16470 and ADXL345 are in operation with 3.3V.
Please consult the product information and SPI documentation for detail.
This product is widely on sale in the world, so that you can choose the distributer in your country.
ADIS16470
ADIS16470 is a complete inertial system that includes a triaxis gyroscope and a triaxis accelerometer. It has a SPI interface.
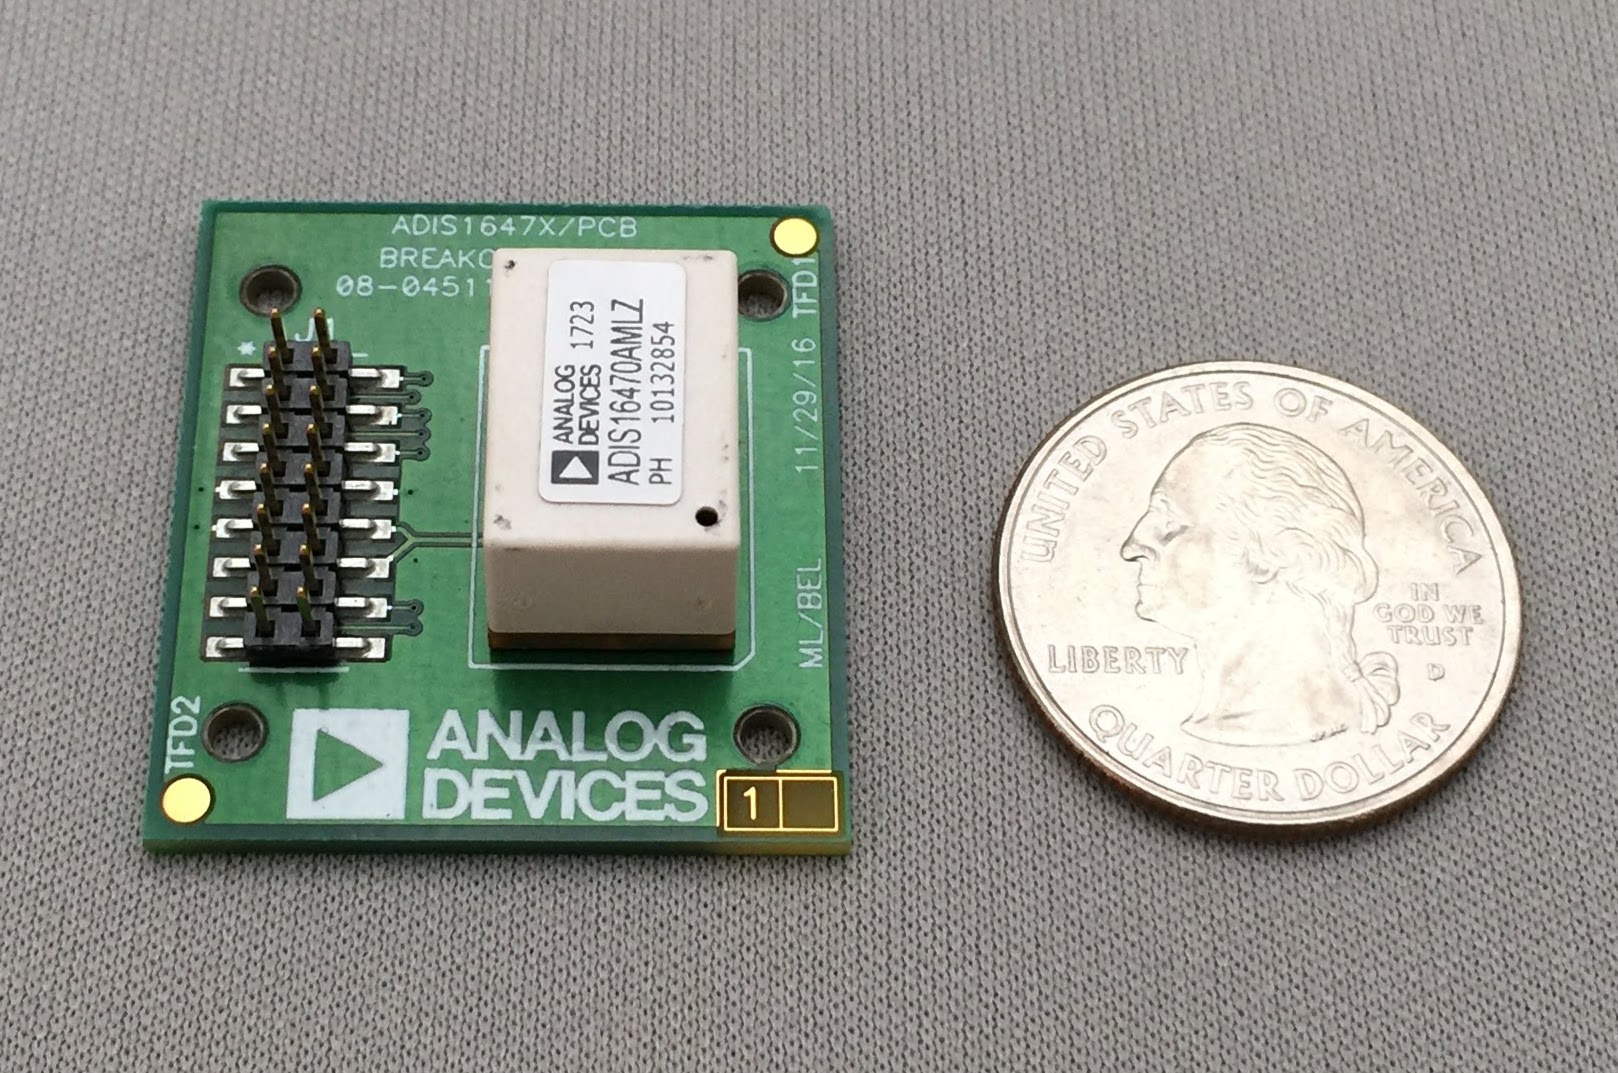
The sensor device is a BGA mounted chip, so it should be easier to use the breakout board . The following section assumes to use this breakout board.
Connection
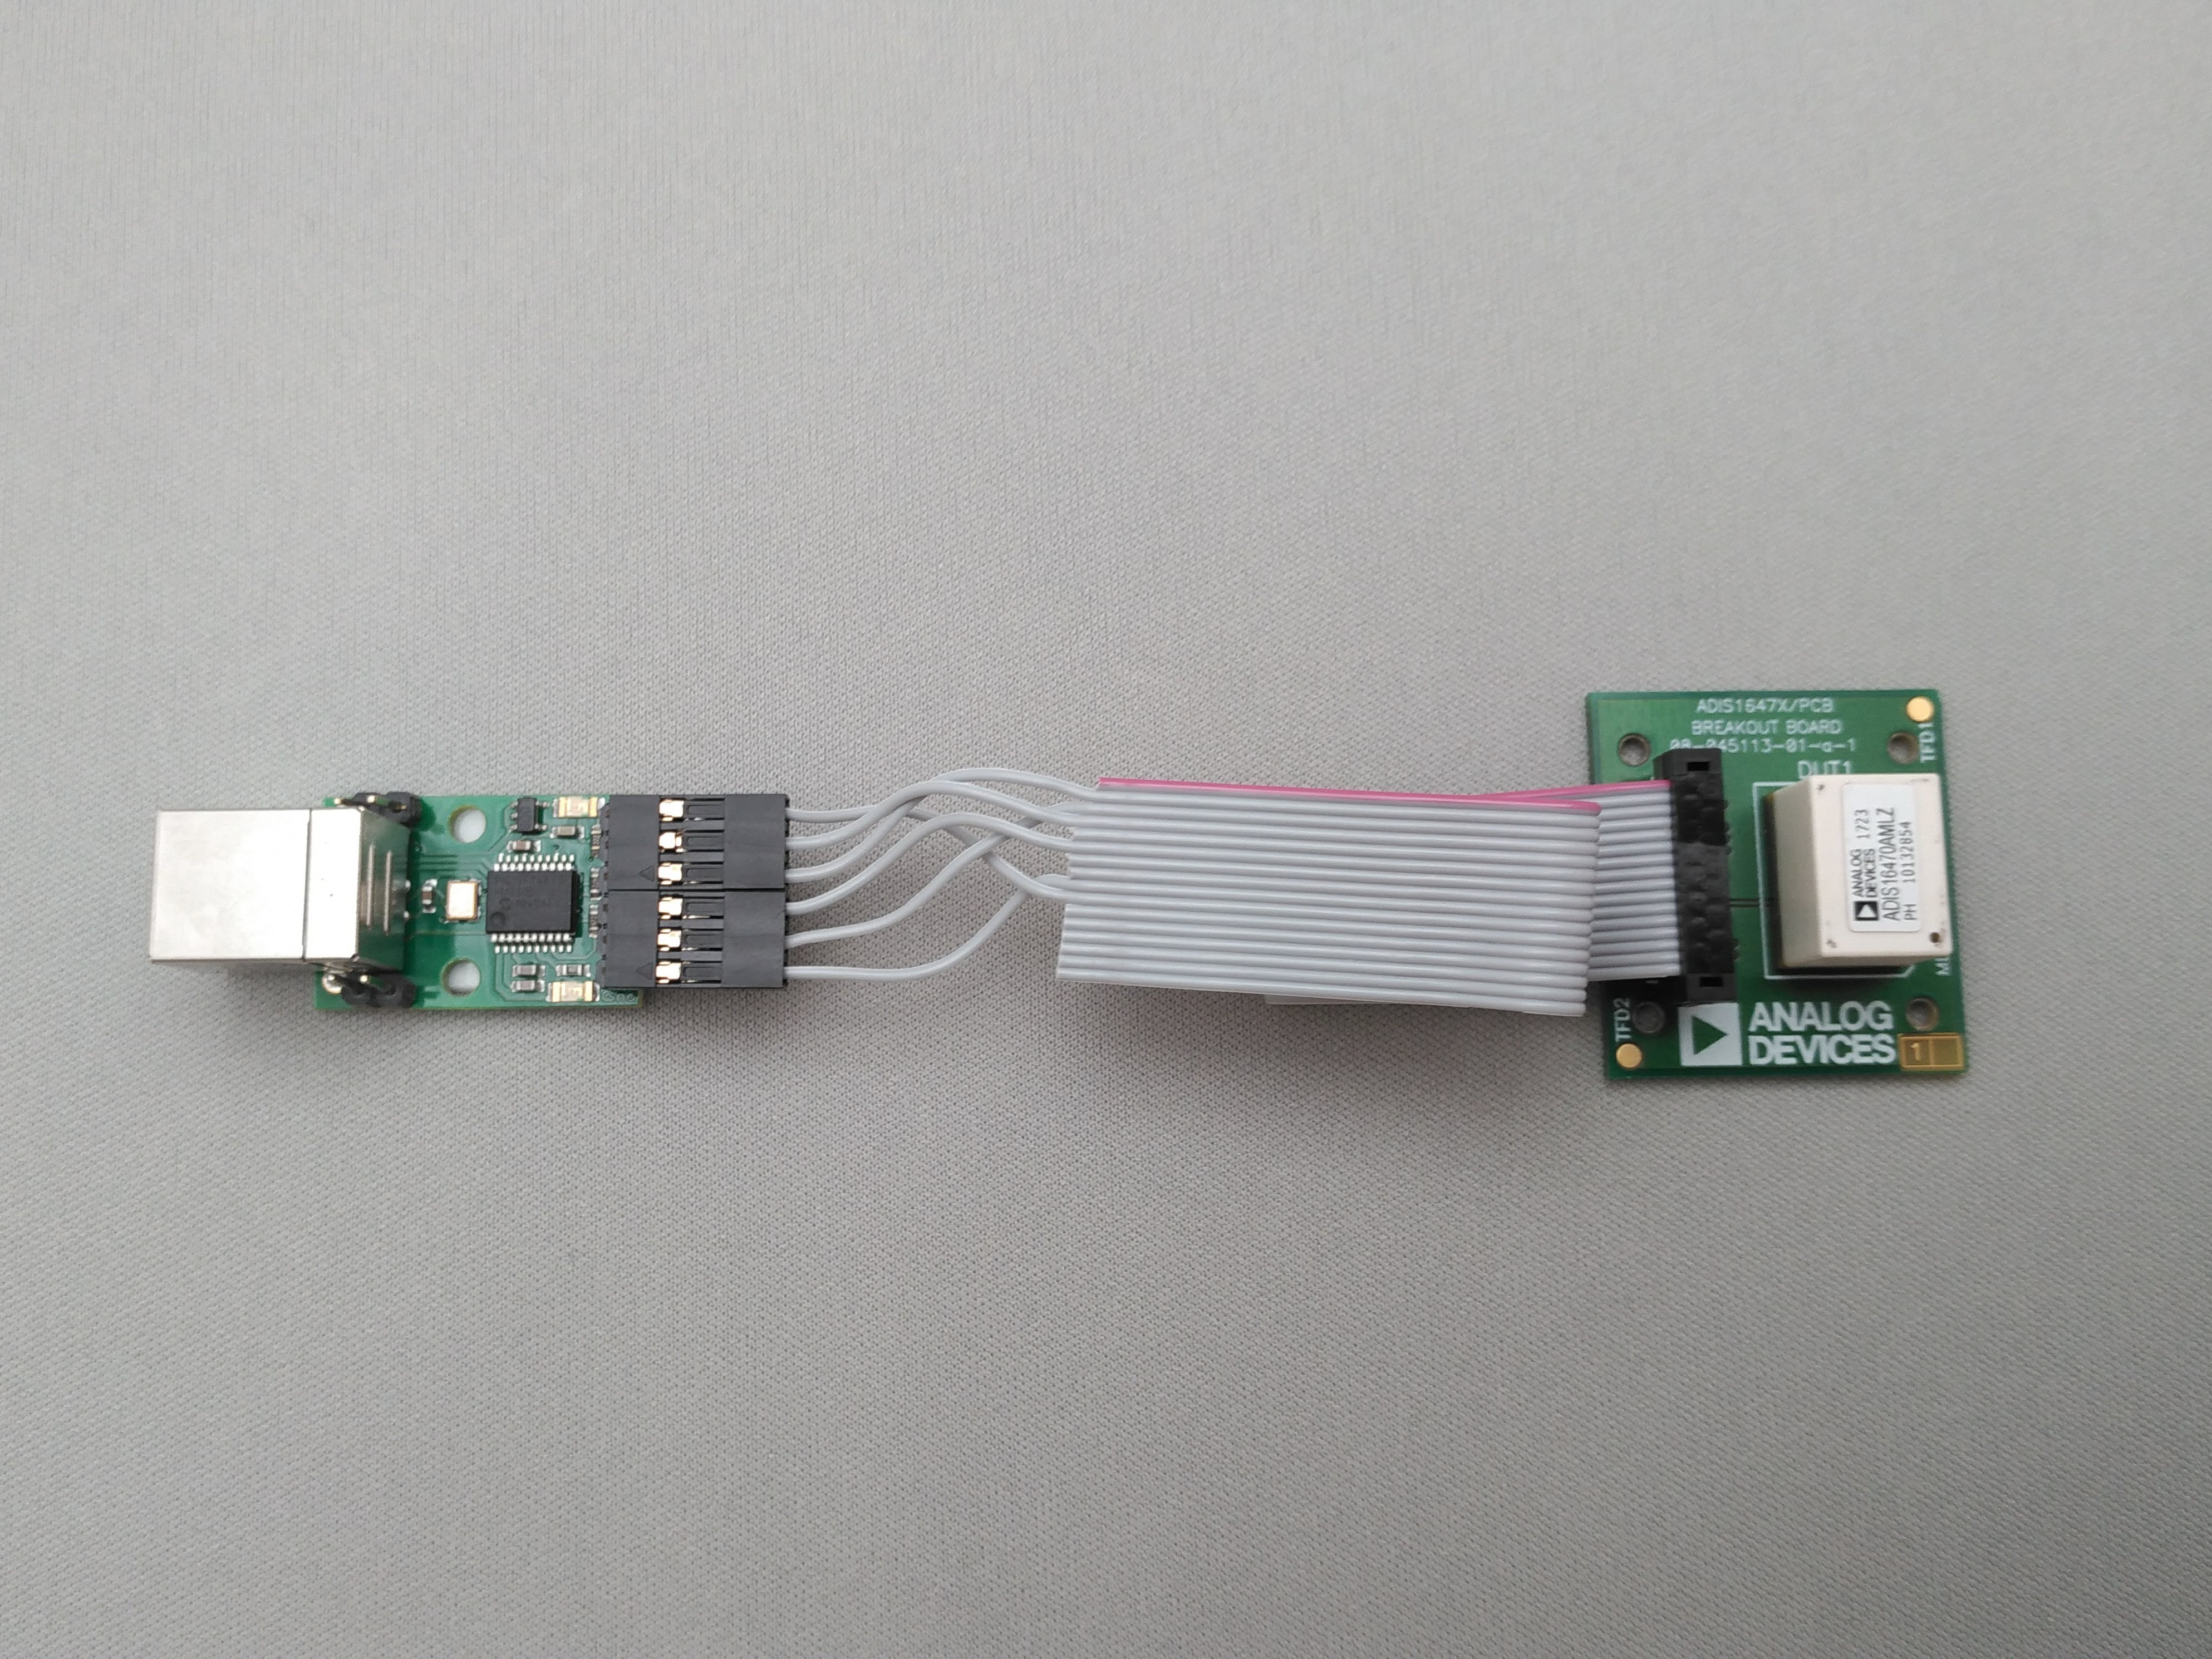
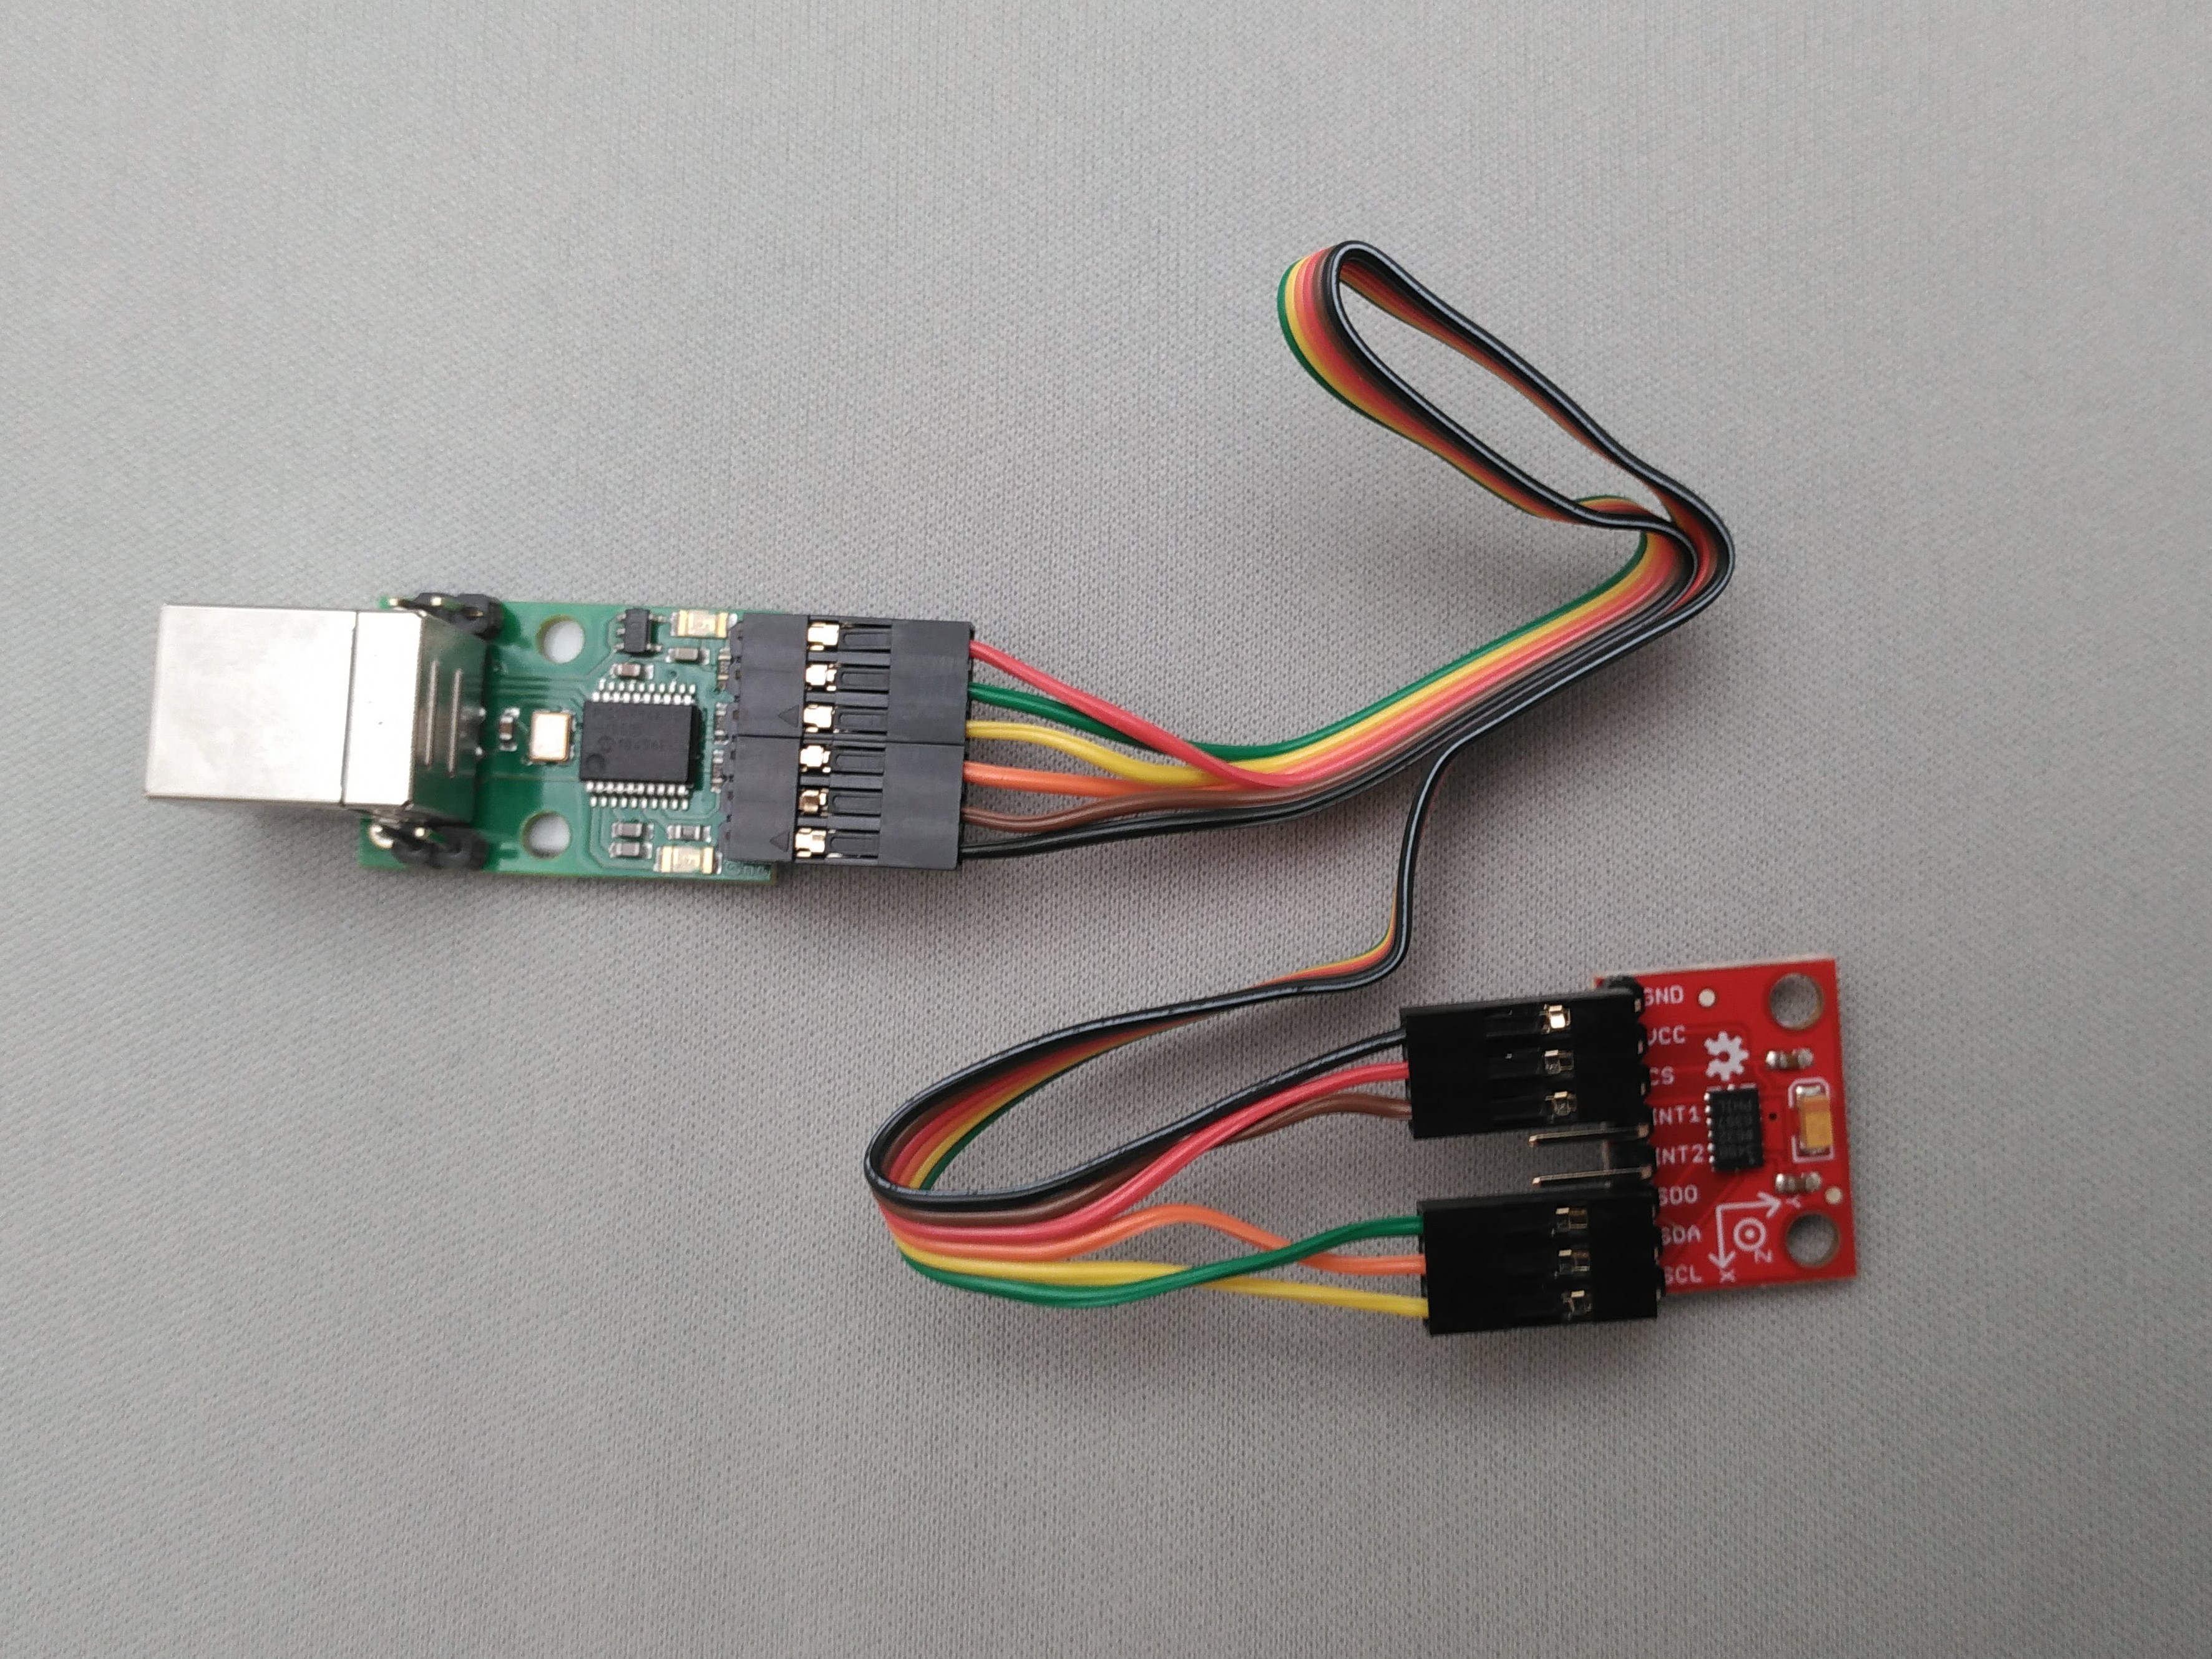
You need to build a flat cable to connect the USB-ISS and the ADIS16470 breakout board. The picture shows an implementation.
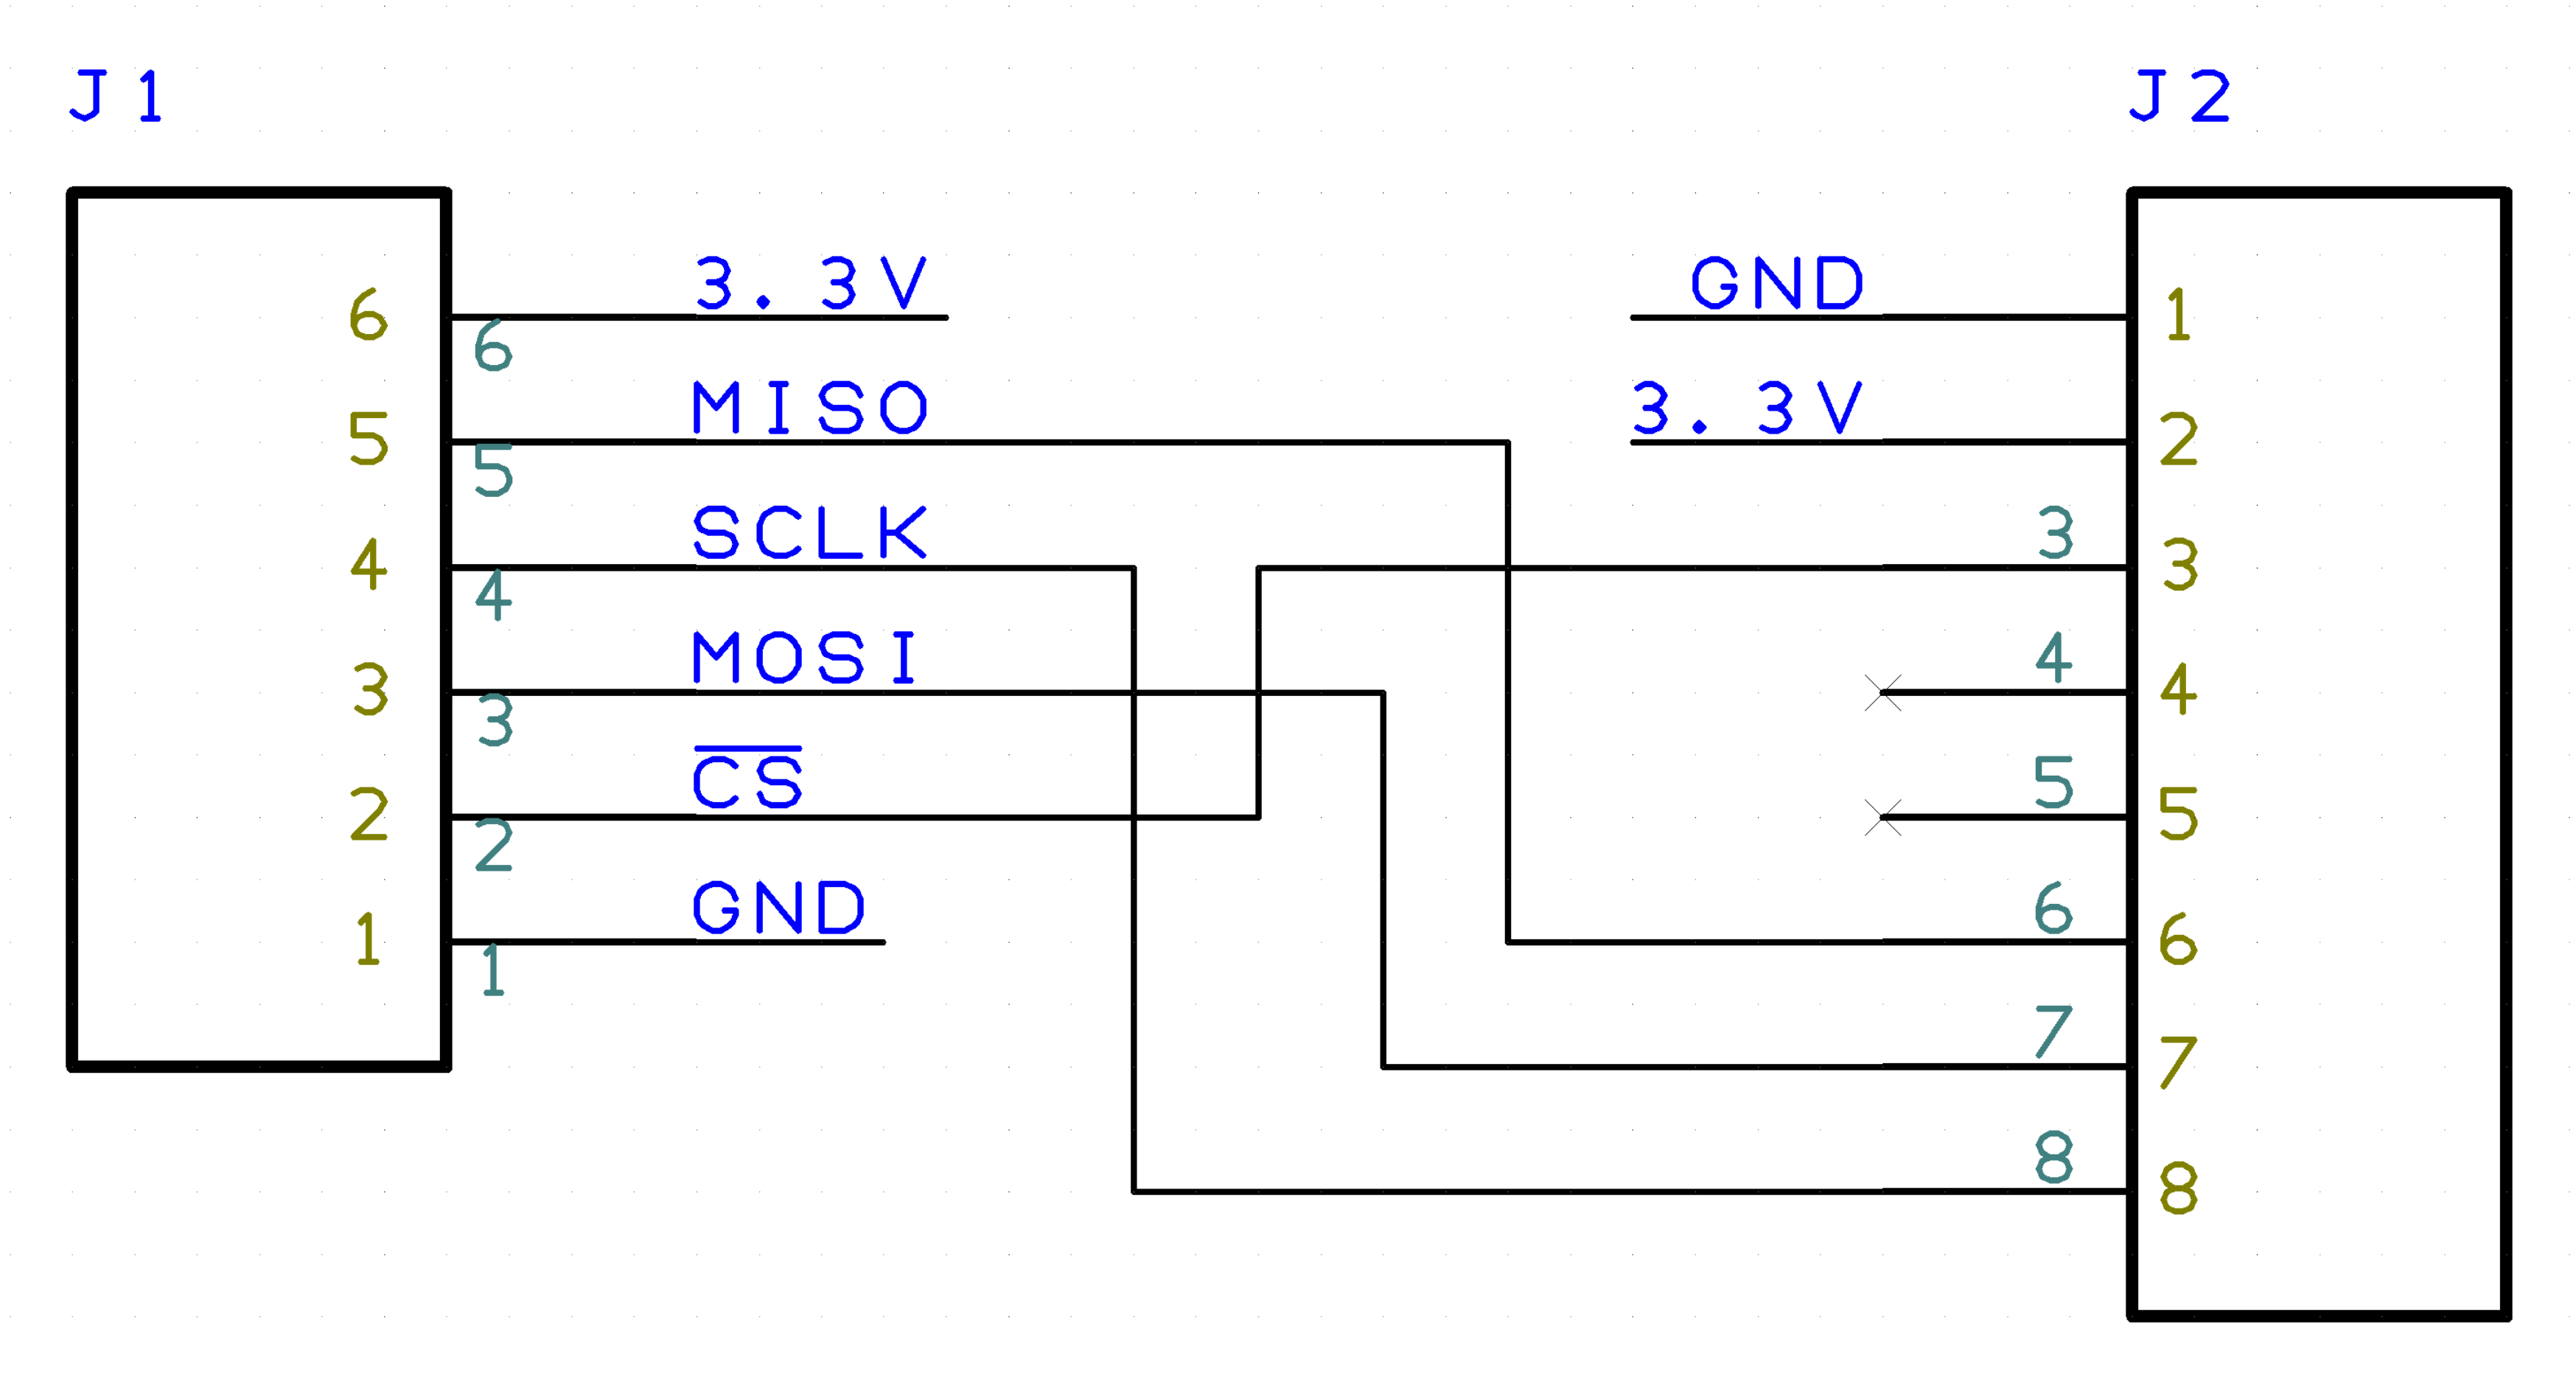
Very simple schematic is here. J1 is the USB-ISS pin and J2 is the 2mm pin headers on the ADIS16470 breakout board.
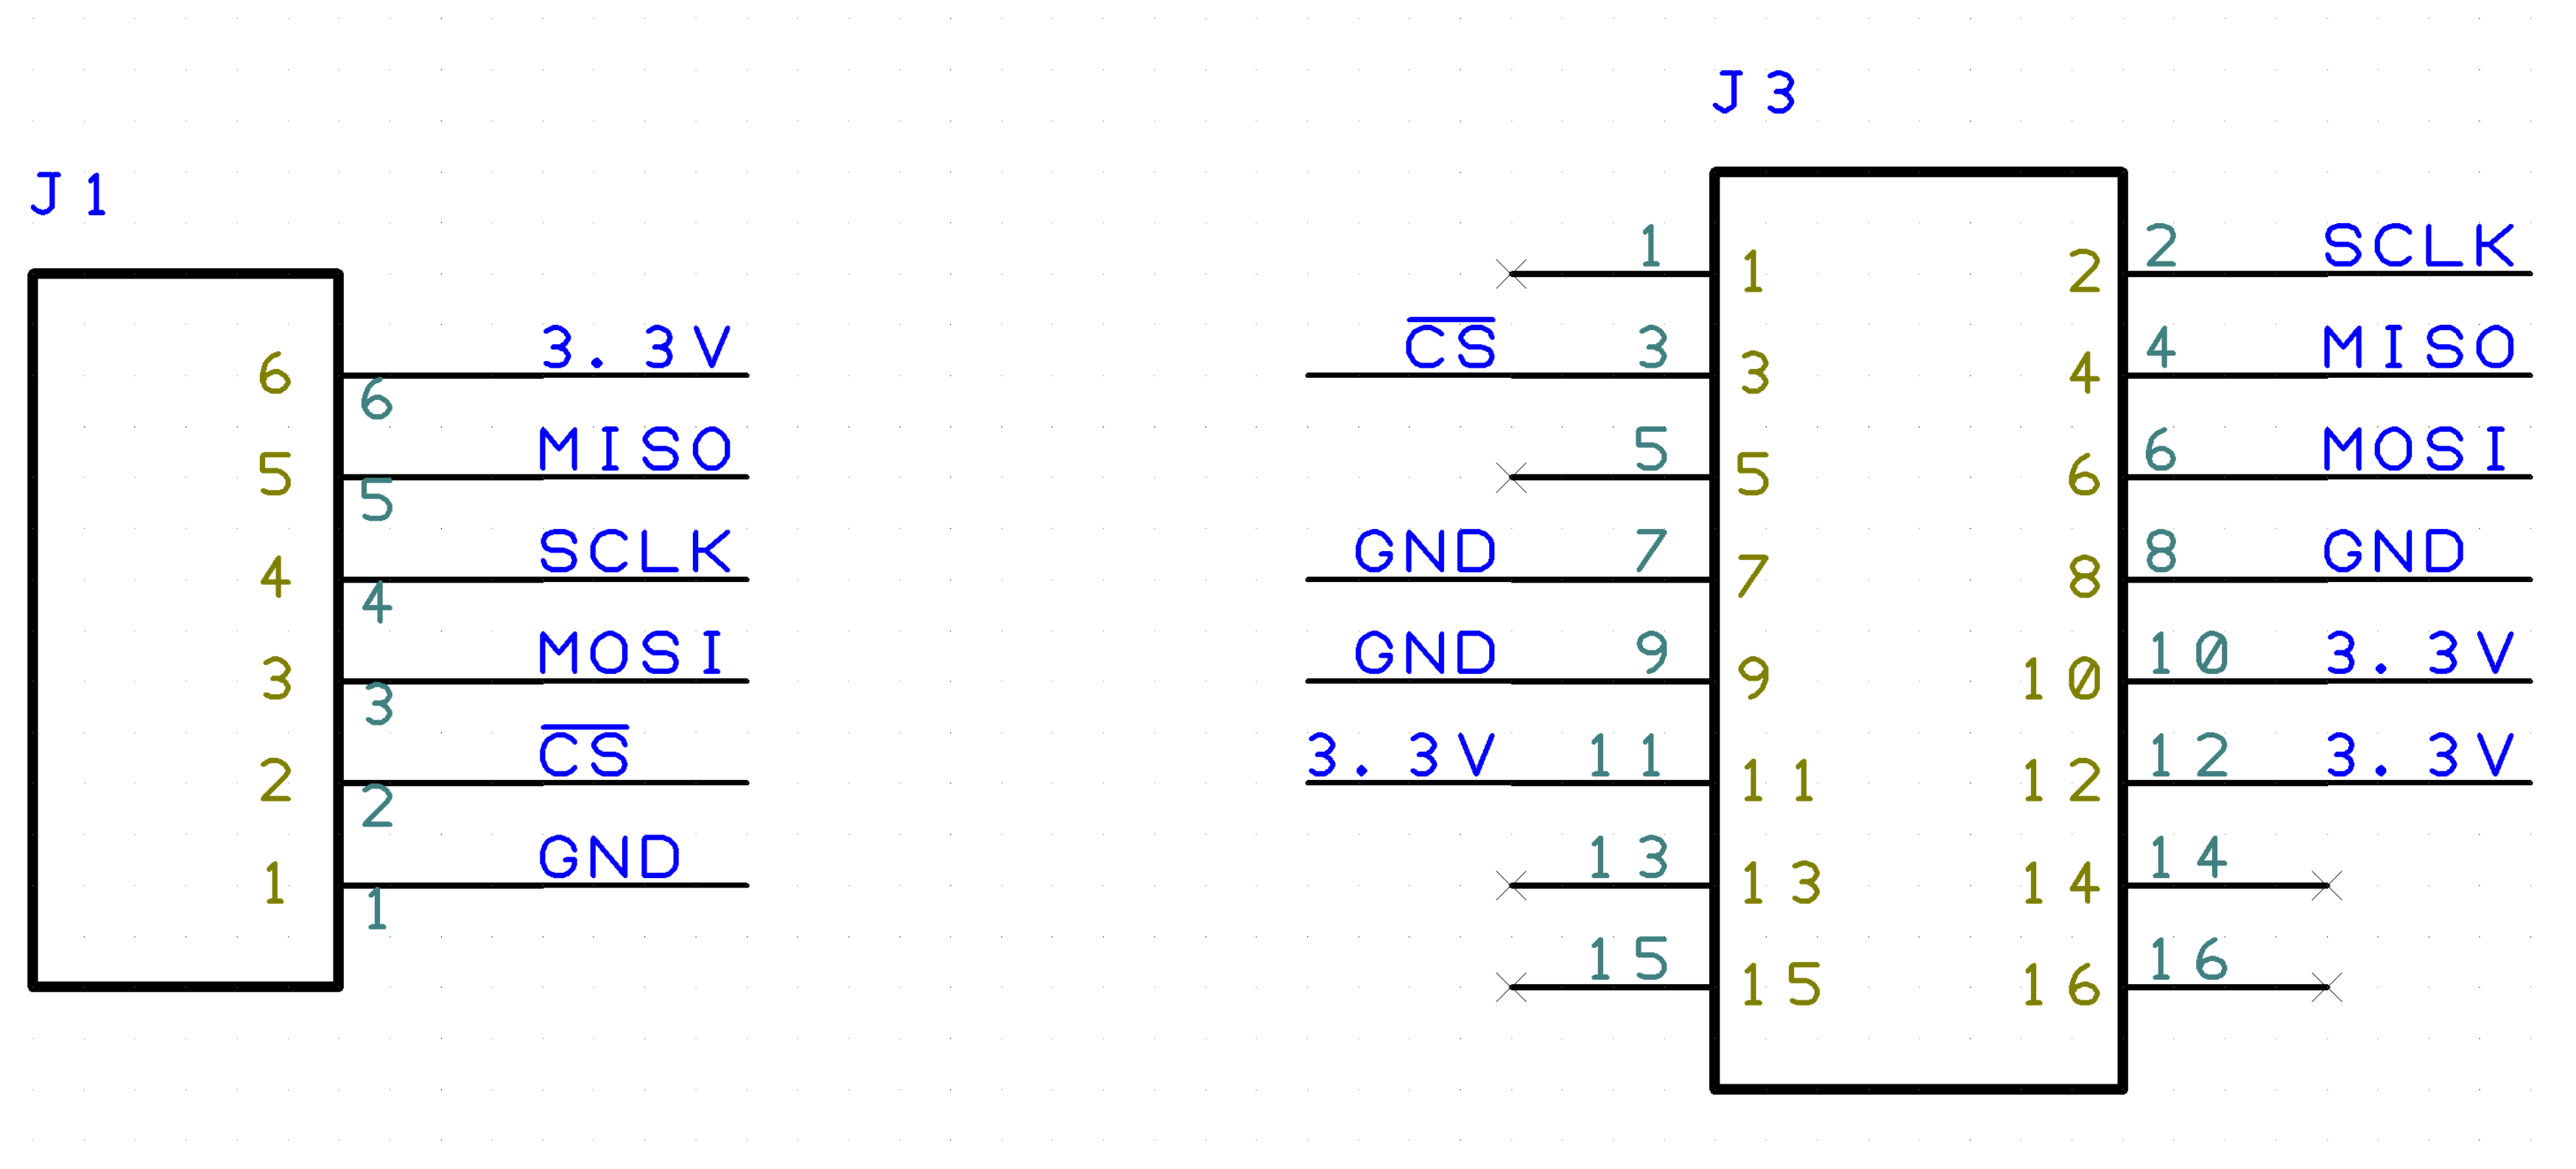
Minimum pins are used and each pin is directly corresponds to another’s. Note that you only need to connect one of the power-line(3.3V and GND), because they are connected in the breakout board.
Parts list
The parts list of the cable is here:
J1: 2550 Connector 6pin
J2: FCI Connector for 1.0mm pitch ribon cable
1.0 mm pitch ribon cable
ADXL345
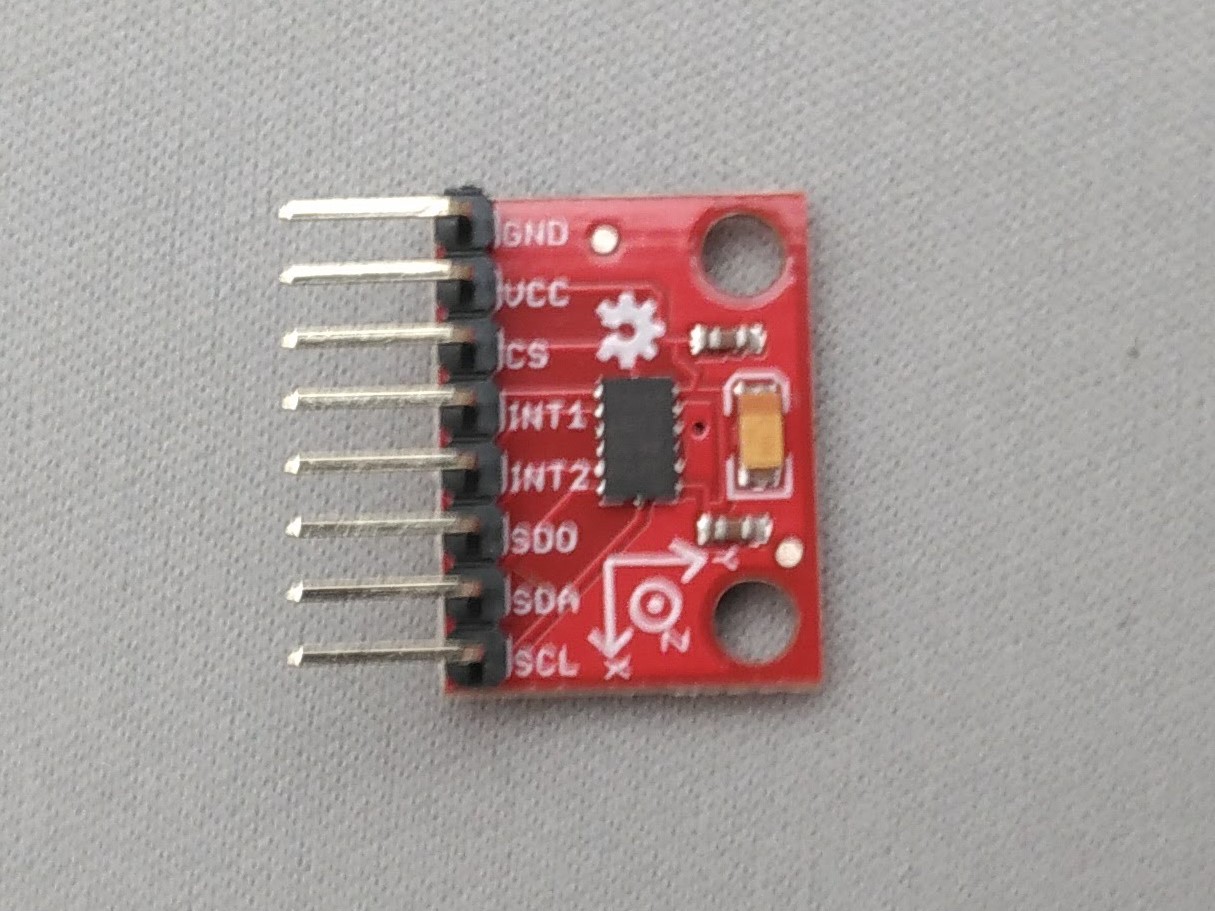
ADXL345 is a three axis accerometer sensor. It has a SPI interface. The following section assumes to use this breakout board.
- ADXL345 Breakout board
How to use the package
Check the connection
Assuming USB-ISS and the sensor are connected to your PC with a USB
cable. Make sure you can see the device file at /dev/ttyACM*.
$ ls /dev/ttyACM*
/dev/ttyACM0
You need your user account is in the dialout group to acces
/dev/ttyACM* . Check if you are already in the dialout group by
groups command.
$ groups
your_user_name adm dialout cdrom sudo dip plugdev lpadmin sambashare
If you don’t find dialout there, you should add the user into the
group by adduser command.
Note that you need to _restart_ after you added the user into the ``dialout`` group
$ sudo adduser your_user_name dialout
If a software called modemmanager is installed in your PC, it takes several seconds until /dev/ttyACM* available. You can avoid it to uninstall the modemmanager.
$ sudo apt remove modemmanager
Start AIDS16470 nodes
You can use a launch file to run the sensor nodes with visulalizer as:
$ roslaunch adi_driver adis16470.launch with_rviz:=true
This launch file has several arguments which configure the system.
with_filter: Start a filter node ofimu_filter_madgwickpackage to estimate the IMU’s pose using Extended Kalman Filter. Default istrue.with_rviz: Start a viewer to visualize the pose of the IMU. Default isfalse.with_plot: Start a viewer to plot the graph of angular velocity and acceleration. Default isfalse.device: Specify the device file name for USB-ISS. Default is/dev/ttyACM0.frame_id: Specify the name of frame of the sensor. Default isimuburst_read: If true, the sensor node uses theburst read modewhich is on the ADIS16470 ‘s manual. Default isfalse.rate: It define the sampling rate of the IMU in Hz. Default
is 100.
Senesor data topics
Once the system launched, the sensor data keep published on ROS
topics. You can see the list of the ROS topic by rostopic command.
$ rostopic list
/imu/data
/imu/data_raw
/imu_filter/parameter_descriptions
/imu_filter/parameter_updates
/rosout
/rosout_agg
/tf
The sensor data are on these two topics:
/imu/data_raw: The raw sensor data from ADIS16470, which contains only angular velocities and linear accelerations./imu/data: The sensor data proceeded by EKF usingimu_filter_nodefromimu_filter_madgwickpackage. It contains orientation information in addition to the angular velocities and linear accelerations.
Check sensor data
You can see the sensor data streaming by rostopic command.
$ rostopic echo /imu/data
---
header:
 seq: 2541
 stamp:
   secs: 1513238708
   nsecs: 838857288
 frame_id: "imu"
orientation:
  x: -0.0111724457234
  y: -0.0125930607599
  z: -0.710443497794
  w: 0.703552860643
orientation_covariance: [0.0, 0.0, 0.0, 0.0, 0.0, 0.0, 0.0, 0.0, 0.0]
angular_velocity:
  x: 0.00750825006126
  y: -0.0128681014395
  z: 0.000681076817177
angular_velocity_covariance: [0.0, 0.0, 0.0, 0.0, 0.0, 0.0, 0.0, 0.0, 0.0]
linear_acceleration:
  x: 0.3929231987
  y: 0.00754166793823
  z: 10.0754171448
linear_acceleration_covariance: [0.0, 0.0, 0.0, 0.0, 0.0, 0.0, 0.0, 0.0, 0.0]
---
Type of the sensor data
sensor_msgs/Imu is the sensor message type for IMUs.
$ rosmsg show sensor_msgs/Imu

std_msgs/Header header
    uint32 seq
    time stamp
    string frame_id
geometry_msgs/Quaternion orientation
    float64 x
    float64 y
    float64 z
    float64 w
float64[9] orientation_covariance
geometry_msgs/Vector3 angular_velocity
    float64 x
    float64 y
    float64 z
float64[9] angular_velocity_covariance
geometry_msgs/Vector3 linear_acceleration
    float64 x
    float64 y
    float64 z
    float64[9] linear_acceleration_covariance
Visulaization
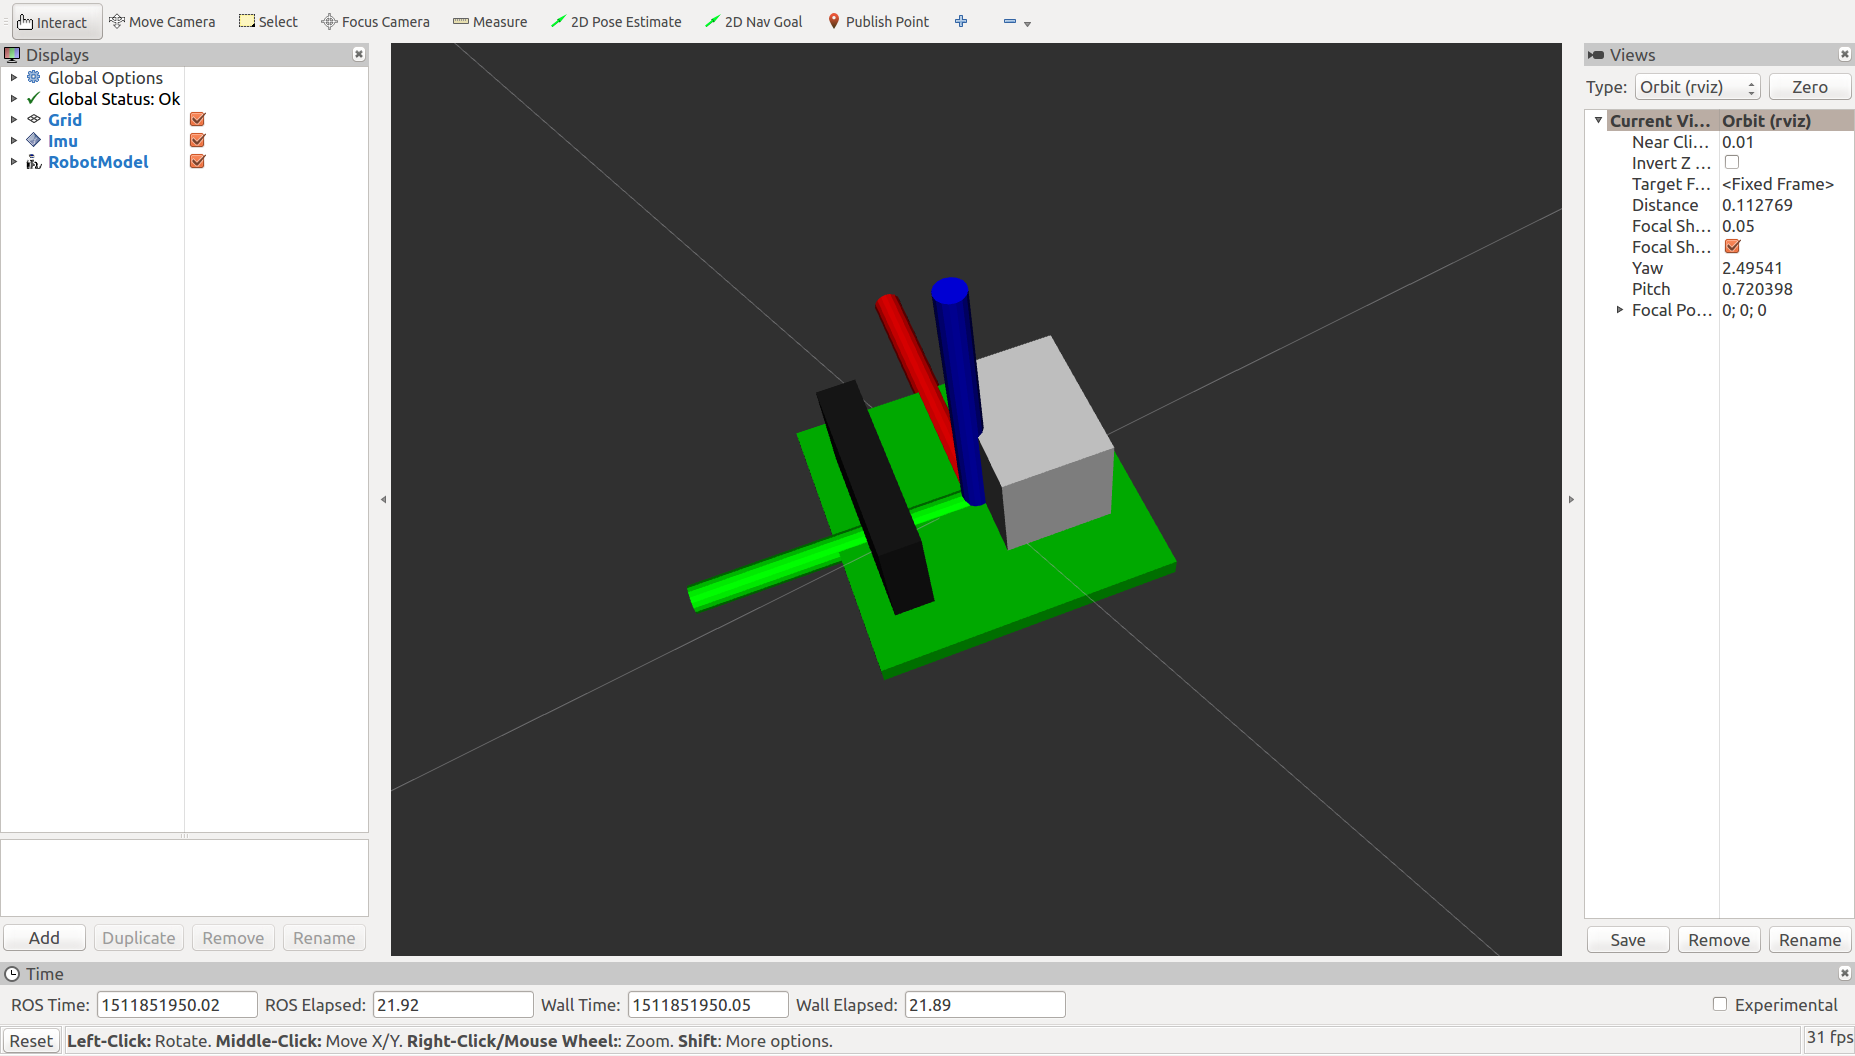
You can see the model of ADIS16470 breakout board in rviz
panel. launch/imu.rviz is the config file for rviz.
$ roslaunch adi_driver adis16470.launch with_rviz:=true
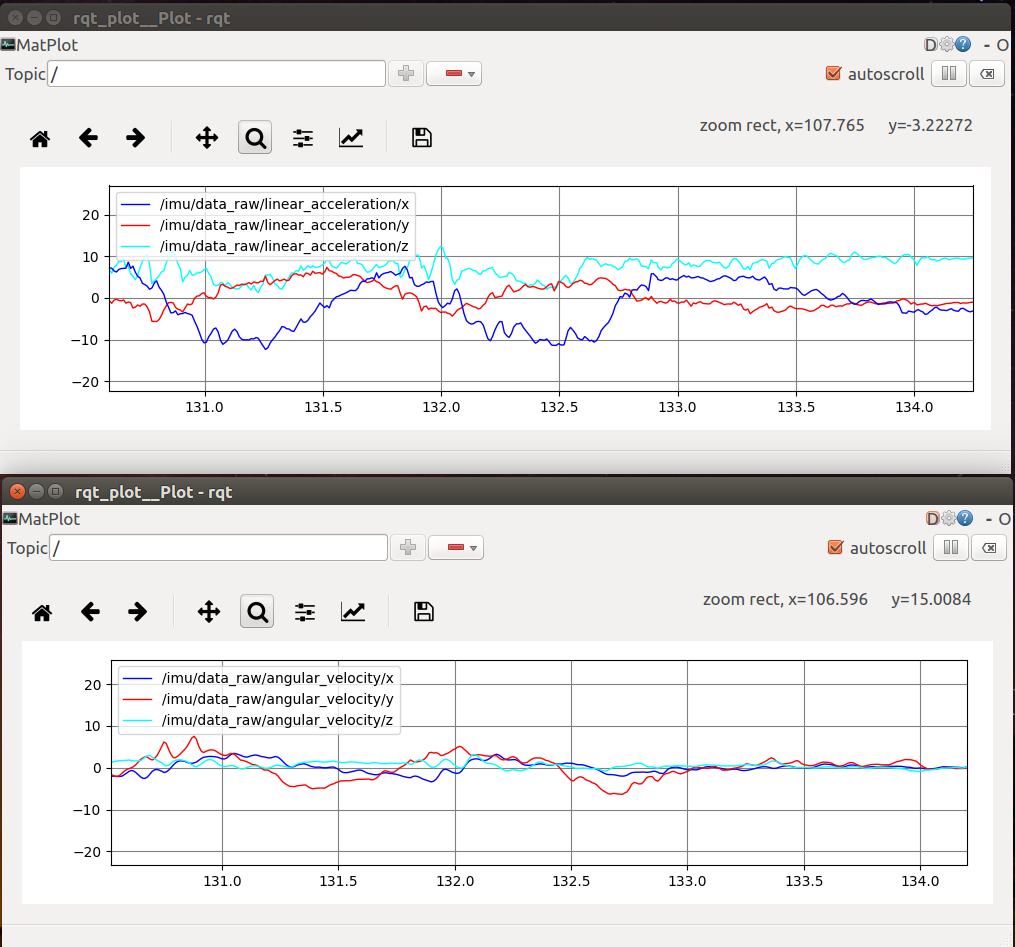
You can plot the magnitude of sensor value on graphs using
rqt_plot.
$ roslaunch adi_driver adis16470.launch with_plot:=true
Start ADXL345 nodes
You can use a launch file to run the sensor nodes with graph plot as:
$ roslaunch adi_driver adxl345.launch with_plot:=true
